How to deploy any app in railway (heroku alternative)
The process of deploying any apps in railway.app is pretty much the same. Railway app has built their own builder called Nixpacks and what it does is scan your source code to auto generate a build plan for you. They run in 3 phases
- Setup: Install all necessary Nix packages
- Install: Download all build dependencies
- Build: Generate everything necessary to run the app
Since we don't have to worry about the build and deploy in Railway app, lets go ahead and deploy a laravel app, for example. You would however require a github account for the deployment
For the purpose of this demo, i went on to laravel repo and forked the repository to my github account.
Step 1: Click New on Railway app
Hit the new button and choose Github repo and then click Configure Github app. Once you authenticate the github app, you can go to the section below and choose your codebase. In this case, i'm choosing laravel-test.
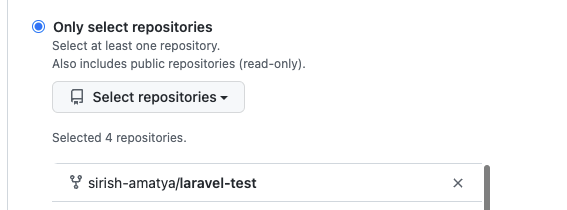
Now in railway app, choose the repo laravel-test like below

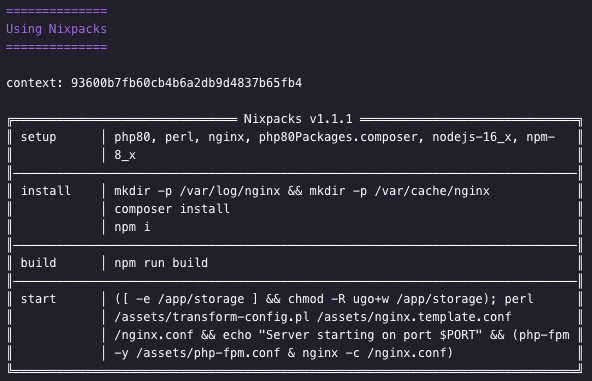
Once you do this, Nixpack will scan your code and figure out that it's a laravel app and then install all the dependecies for the app automatically. You can look at the Build Logs tab and see the build plan and the logs like below.
Step 2: Generate the url
Now go to the Settings tab and click on Generate Domain. This will generate a random url for you.

Congratulation, you are half-way there. If you click the link, you'll see a 500 error.
Step 3: Set the environmental variables
Now you'll need to set the environment variables. Go to variables tab and set the following variables. I've generated a random key from here for the purpose of the demo
APP_KEY = base64:a2M3NnJoNDhoOXp6NzFpcXp6OWttMm1xaDd1cnN3Y2s=
APP_ENV = production
APP_URL = laravel-test-production.89cd.up.railway.app
Once you add those, the railway will rebuild and deploy your app with the new config. Keep an eye on the Deploy logs and once the deployment is successful you'll see a log that says something like
Server starting on port 6169
Congratulations! This means that the app has been deployed and if you now click the url generated from previous step, you'll see that your laravel app has been deployed successfully. You can clone your laravel repo in your local, create an awesome project and push it back to your github account. The deployment will now happen automatically. The process of deploying other apps like VueJS, ReactJS, NextJS is also similar.
Additional tips
You can also set up a Custom Domain if you'd like.
You could also define a route /health in web.php in Laravel and put that in HealthCheck text box that you'll see in Settings tab. The benefit of doing this is that you'll not see error pages between deployments. When deployment is in progress, the system will make a request to this url and see if it's getting a 200 OK response. Only then it'll make the switch. Otherwise you might see an error page for sometime in every deployment.
When i tried to implement admin panel in Laravel, my css went haywire. I have a post for here for the fix.
If you want to know about how to run a cronjob in Laravel app. Checkout Cronjob in railway app.
If you are using laravel as an API server or using proxy, you might have to allow proxy in App\Http\Middleware\TrustProxies.php
<?php

namespace App\Http\Middleware;

use Illuminate\Http\Middleware\TrustProxies as Middleware;
use Illuminate\Http\Request;

class TrustProxies extends Middleware
{
    protected $proxies = '*'; // or  protected $proxies = '**';

    ...
}
If you are using a database, you can set the environment variable NIXPACKS_BUILD_CMD with following commands. The commands set in this variable will run after the app is deployed.
php artisan migrate --force && php artisan optimizeLatest Post
Information retrieval – Searching of text using Elasticsearch
Information retrieval is the process of obtaining relevant information resources from the collection of resources relevant to information need.
Learn more